Quilted Pillow - Easy Instructions

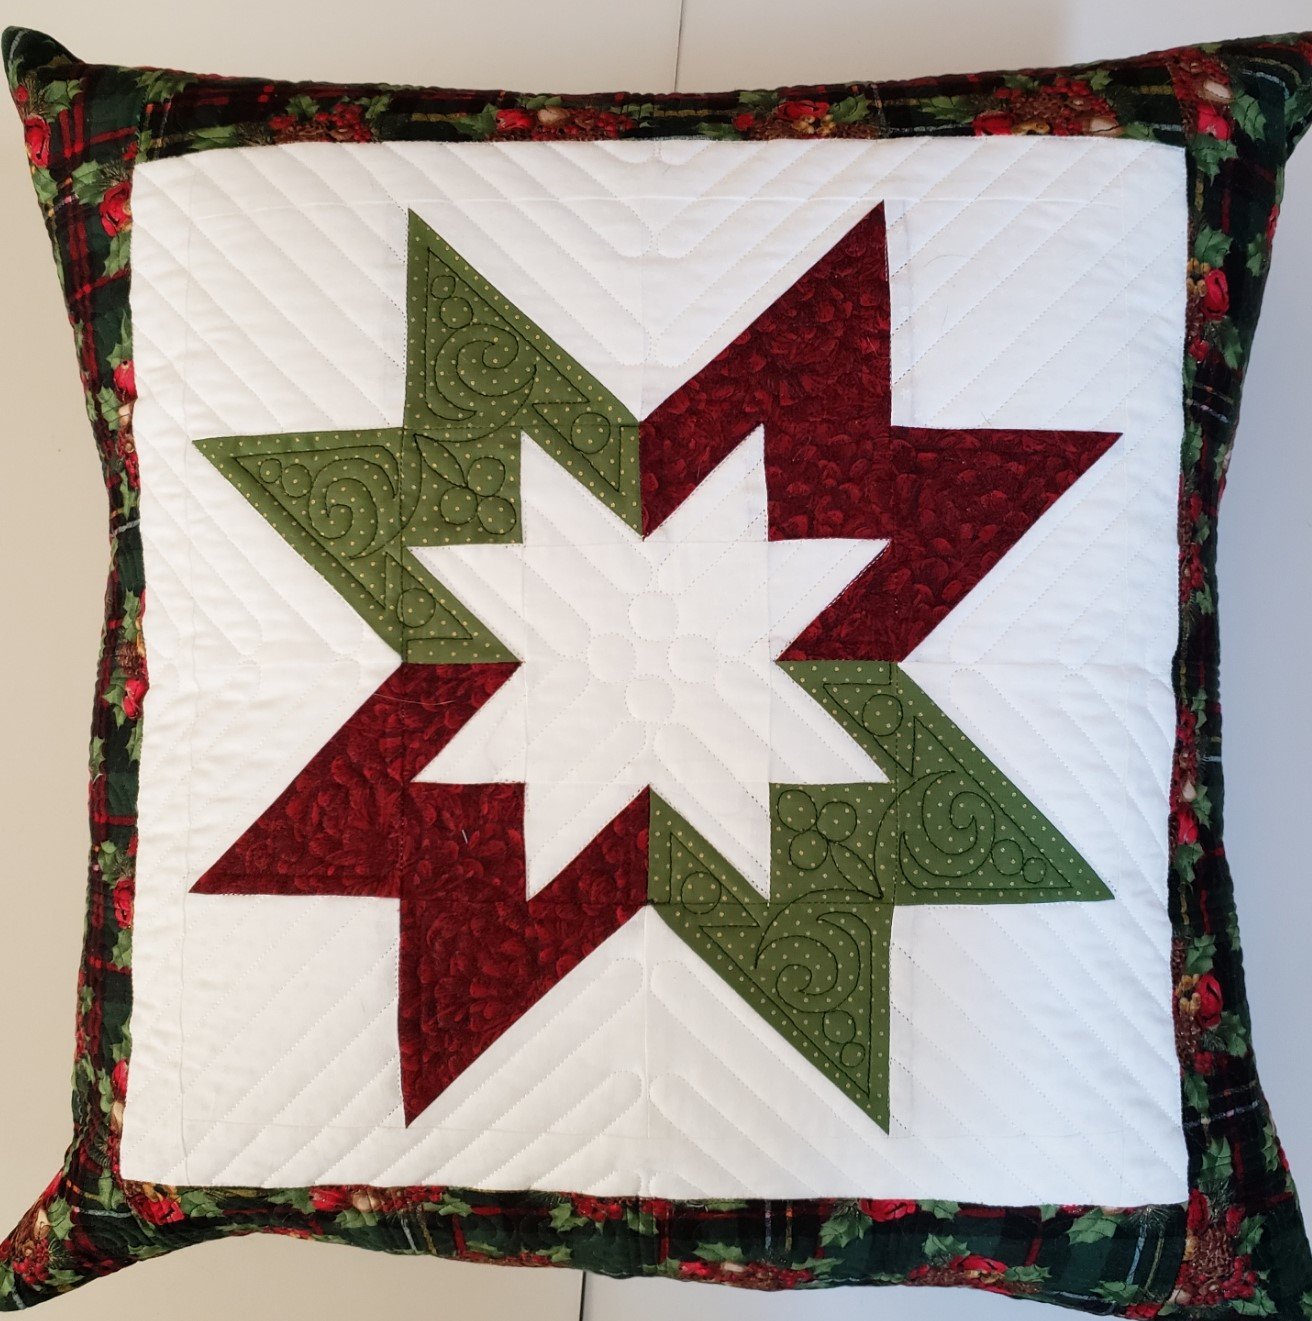
I spent a good part of my weekend finishing up the quilted pillow I started back in September. Actually, I made seven and I'm planning them as gifts for several friends and family members. I added a couple Halloween pillows for those folks that decorate more for Halloween than Christmas. ;-) All of the quilted pillows are easy projects to complete. I used the "envelope" method to make a single block design into a pillow.
As I mentioned, my blocks were quilted back in September while working on one of the Skill Builder lessons from Joan Knight and Joyce Lundrigan.
Make a Quilted Pillow
Supplies
- A favorite quilt block or printed fabric panel
- A pillow insert - they come in a variety of sizes and shapes. This is the one I use - Acanva Pillow Inserts
- Fabric for the back - width the same as your finished quilt block and length a minimum of 6-8" longer than the block
- Muslin and a scrap piece of batting 4-6" larger than your quilt block
- Safety pins to hold the sandwich together or adhesive spray - I used 505 Spray single or 3-pack
- Thread, needles, sewing machine...the usual sewing supplies
Quilt the Block

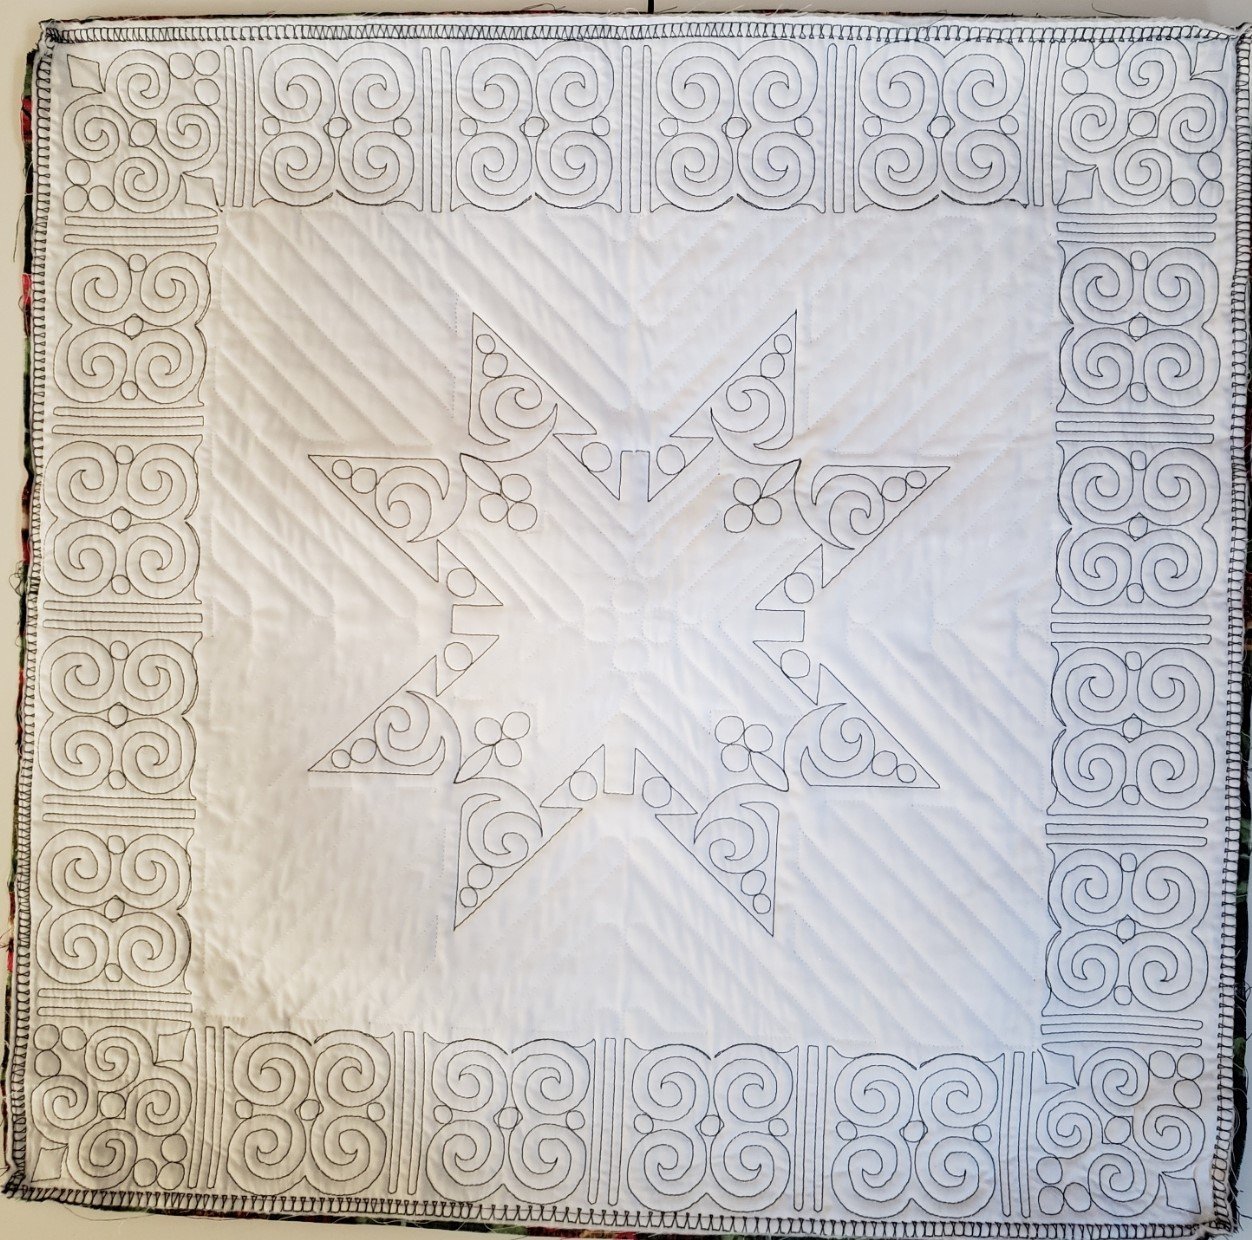
Start with a favorite quilt block design. Create a quilting sandwich by layering the piece of muslin, batting, and your quilt block. The muslin doesn't need to be nice or even coordinating fabric since it will be inside the finished pillow. I used a piece of white muslin. Pin the layers together or follow the instructions on the spray adhesive.
I used a tree block and a star block. To give it a more finished look and honestly, to make it the right side to fit my pillow form, I added a small border all around the block. You want your finished quilted block to be trimmed to 1" larger than your pillow insert size.
Next, quilt the sandwich. This is a great project to practice ruler work, if that is something you would like to try. Here's a video by HollyAnne Knight that provides a good visual of this technique. You could also use an all over stipple pattern. There is no need to get complex with the quilting unless you want to.
Prepare the Backing

For the back of the pillow and to create the envelope, I cut two pieces of fabric as follows:
- Measure the size of your quilted block
- Divide than number by 2
- Add 3 or 4 to that number. Example: Block measures 17" so 17/2= 8.5 Then 8.5+3=11.5 (if using 4, 12.5)
- Now, cut two pieces of your backing fabric 17" x 11.5" or 17" x 12.5"
This will create a 2.5-3” overlapped opening for inserting the pillow form when finished.
Next, turn under 1/4" to 1/2" on one of the 17" edges of each piece to create a finished edge for the envelope.

Make the Envelope
Now we'll layer the envelope.
- Place the quilted block right-side up on a work surface
- Take one of the backing pieces and place it right-sides together with the quilt block. Align the raw edge of the 17" side with the top of your quilt block . The finished edge will be a few inches above the bottom edge. (see the picture.)
- Place the second piece with the 17" raw edge aligned with the bottom edge of the quilt block and the finished edge a few inches from the top edge. The pieces must overlap about 2-3".
- Pin in place
- Stitch a 1/2" seam all the way around the block. I used an overlap stitch available on my machine to finish the edges of the seam.
Finishing the Quilted Pillow
The last steps include tuning the pillow envelope to the right-side out. Finish by placing the pillow insert into the envelope.
Enjoy your Quilted Pillow!!
Until next time,